We’ve all seen them: those gorgeous, handmade socks that look impossible to create. They sit in our Instagram feeds and Ravelry queues, looking simultaneously cozy and intimidating. If you’ve been telling yourself, “Socks are too hard,” or “I don’t have the patience,” this post is your permission slip to be brave and dive in.
The truth? Socks are not complicated. They are simply an accumulation of basic skills. If you know how to decrease, pick up stitches, and knit in the round, you already have the core skills to make a beautiful, custom-fit pair.
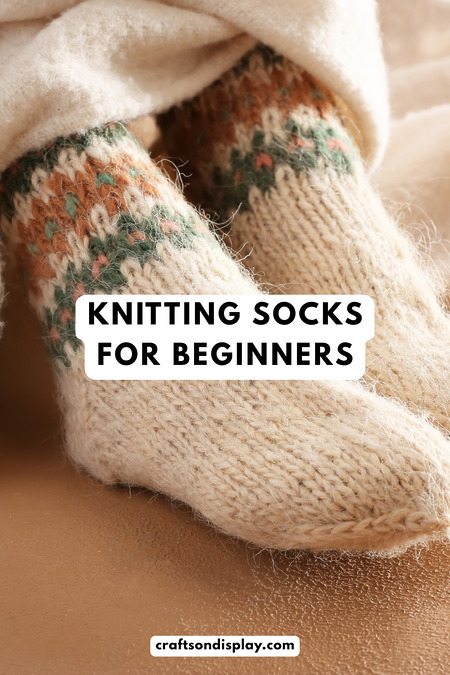
Let’s dive into everything you need to know to move from sock-dreamer to sock-knitter! This comprehensive guide to knitting socks for beginners will walk you through every step.
Are Socks Really Hard to Knit? (The Scale Problem)
Let’s be honest: the biggest initial hurdle isn’t the difficulty of the pattern – it’s the scale.
When you’re used to casting on stitches with bulky yarn and size 10 US needles to make a massive, fast-growing project, switching to fingering weight yarn and size 1 or 2 US needles feels like learning to knit all over again.
- It’s Slower: Your progress, stitch by stitch, will feel incredibly slow at first. Don’t measure your success against that chunky blanket you just finished. Measure it by how much you learned in an hour.
- The Circumference Challenge: It’s tricky getting used to such a small circumference at first. Whether you choose Double-Pointed Needles (DPNs) or the Magic Loop method, manipulating the yarn and needles around that tiny circle requires a bit of practice. Be patient with your hands – they need time to adjust to the micro-movements.
The Payoff: Why Small Knitting is the Best Knitting
Stick with it, because the benefits are enormous:
- Less Hand Pain: Once you’re in the rhythm, the small, lightweight needles and fine yarn can actually be less taxing on your hands than wrestling a huge, heavy sweater.
- A Truly Portable Project: Forget dragging a massive tote bag around. Your sock project fits easily into a small handbag, making it the perfect knit for the bus, the coffee shop, or even just sitting next to a fireplace.
- The Ultimate Custom Fit: Nothing feels better than a pair of socks perfectly tailored to your own foot length and width.
How Long Does This Take? (Managing Expectations)
This is the question every beginner asks, and the answer is maddeningly vague: it depends.
If you’re a beginner, plan on spending anywhere from 40 to 80 hours on your very first pair. Yes, that sounds like a lot! But remember, this time includes learning new techniques, consulting tutorials, and inevitably ripping back and starting again (which is just part of the process!).
Here is a rough breakdown of where that time goes:
- Cuff & Leg (10–20 hours): Getting used to the small gauge and circular knitting.
- Heel Shaping (5–15 hours): This is the highest learning curve (heel flap, turn, gusset).
- Foot (10–20 hours): This is Stockinette stitch cruise control, but it still takes a while!
- Toe Shaping (3–8 hours): Decreasing and closing the end.
The good news? An experienced sock knitter can churn out a pair in 10-30 hours. Once you have two or three pairs under your belt, your speed will skyrocket. For now, think of your first pair as a journey, not a race.
Choosing Your Gear: Yarn and Needles Essentials
Don’t panic about the small tools! Making the right choices here sets you up for success.
The Sock Yarn Secret: Durability is King
You need yarn built to withstand constant rubbing inside a shoe. Do not use 100% Merino wool unless you enjoy darning holes every month! When you’re knitting socks for beginners, choosing the right material is the first step toward success.
- The Magic Blend: Look for a blend, typically called “Fingering Weight Sock Yarn.” The industry standard is 75% Superwash Wool (Merino, Bluefaced Leicester, etc.) and 25% Nylon or Polyamide. The wool provides warmth, elasticity, and softness; the nylon provides the crucial, hard-wearing strength.
- Fabric Density is Your Armor: Your fabric density matters the most for comfort and longevity. You need to knit socks at a dense gauge, often tighter than you might think. Loose fabric will stretch out quickly and wear thin where your foot meets your shoe.
Needle Wars: Magic Loop vs. DPNs
Socks are knit in the round, and you need to choose how you manage that small circumference.
- Magic Loop (Recommended for Beginners): Using one long (32–40 inch) circular needle, you pull the excess cable out in a loop to work across half your stitches at a time. This is often the easiest entry point because you don’t have to juggle five needles, and it’s the best method if you want to knit Two-at-a-Time (a great trick for avoiding second-sock syndrome).
- Double-Pointed Needles (DPNs): Using a set of four or five short, straight needles to divide your stitches. This is the traditional, very portable method. The only risk is that you can end up with slightly looser stitches where the needles meet – called “ladders” – until you master pulling the yarn tight across the gap.
The Essential Moves: Techniques You’ll Master
If you break down a sock, you only have to master three main techniques outside of basic knit and purl stitches:
1. The Heel Construction
The heel is where most beginners panic, but it’s just two parts:
- The Heel Flap & Turn: This is often worked flat (back and forth) using a few simple decrease/slip-stitch rows to form a strong, deep pocket for your heel bone. This is where you truly shape the 90-degree angle of your foot.
- Picking Up Stitches (The Gusset): After the turn, you use your needle to literally scoop up stitches along the side edge of the heel flap. This creates the “gusset,” which is the small triangular section that gives your sock width across the instep. This is why you need to knit a dense flap – it makes the picked-up stitches look clean!
2. Decreasing
Socks require shaping at both the heel and the toe. You will quickly become an expert in clean decreases:
- K2tog (Knit Two Together): A right-leaning decrease, often used for a clean line of decrease.
- SSK (Slip, Slip, Knit): A left-leaning decrease, used as a symmetrical partner to K2tog.
3. Knitting in the Round
This is the default for a sock. It’s simply knitting every row after you join your stitches. The only exception is the heel flap, which, as mentioned, is usually knit flat before you rejoin the circle.
Pro Tips for a Smooth Start and a Happy Finish
These insider tips will save you frustration and speed up your progress!
1. Start with a Hat (Seriously)
Before you tackle the small needles, try knitting a hat with a medium-weight yarn. Hats have a lot of similarities to socks! You knit in the round, you practice casting on, joining, and then you practice shaping the crown with gradual decreases. It’s a low-stakes way to practice the mechanics of circular knitting.
2. Use YouTube and Trust the Process
If a pattern instruction doesn’t make sense, pause and watch it. Seeing the heel turn or the picking up of gusset stitches in action is invaluable. Check out tutorials like:
- How to knit socks on magic loop by Crazy Sock Lady
- Sock knitting tutorial by Voolenvine
3. Banish One Sock Syndrome
We’ve all been there – you finish the first sock, you put it on, it fits perfectly, and then you tuck the yarn away and lose all motivation for the second. This is One Sock Syndrome, and it’s chronic!
The Cure: Fight it by knitting both socks at the same time on one long Magic Loop cable. You cast on both cuffs, you knit them side-by-side, you turn both heels back-to-back, and you finish both toes at the same time. No syndrome, just two finished socks.
4. Measure the Foot, Not the Stitches
The best way to determine when to start your toe decreases is by trying the sock on (if it’s for you) or by measuring the recipient’s foot. You typically start the toe shaping when the sock reaches the base of the person’s pinky toe, or about 2 inches shorter than the total foot length.
Best First Sock Patterns
Don’t wing it! Start with a pattern famous for holding your hand through the process. These patterns are essential resources for knitting socks for beginners.
- Rye Socks by Tin Can Knits: This is an incredible free pattern with sizes from Newborn all the way up to Adult Large. Why is it the gold standard? The designers, Tin Can Knits, also provide a wealth of detailed, step-by-step tutorials on their website that correspond directly to the pattern instructions.
- I’m So Basic Socks by Summer Lee: Perfect if you want to master the Magic Loop method with a straightforward pattern.
- Nimble Needles Beginner Tutorial: If you prefer the traditional DPNs, this site offers a fantastic step-by-step tutorial that breaks down the mechanics and includes an easy striped pattern.
Wear and Care: The Longevity of Handknit Socks
This is the final, essential stage. You spent 60 hours on these – now what?
The big question: Do you wear your handknit socks every day, or do you keep them only for special occasions?
Most knitters and sock wearers agree: Wear and wash them just like commercial socks! Seriously, they are meant to be used. They are durable, breathable, and truly the most comfortable thing you’ll ever put on your feet.
How long do they last?
If you choose a good, hard-wearing yarn and knit them at a dense gauge, they can last for years! The key is maintenance.
- Washing: Always use gentle detergent. Since they are usually Superwash wool, you can often machine wash them on a gentle/cold cycle, but always lay them flat to dry to maintain their perfect fit. Never put them in a hot dryer.
- Darning is Self-Care: If you get a hole in the heel or toe, do not toss them! Learn to darn. Darning is simply patching the worn-out area. It’s a satisfying, sustainable skill that turns your socks into heirloom-quality garments. Darning a pair of socks is the ultimate sign of a loved and well-used knit.
Insider Tips: What the Sock Pros Know (and You Should Too!)
1. Swatching in the Round is Non-Negotiable
You already know gauge is important, but for socks, the type of swatch is crucial.
- Why It Matters: When you knit flat, your purl stitches are often looser than your knit stitches. When knitting in the round, you only ever knit, which results in a different tension. If you swatch flat and then knit your sock in the round, your final fabric density will likely be looser than you intended.
- The Solution: You must knit your gauge swatch in the round. Cast on slightly more stitches than the pattern recommends, knit a few rounds, then knit about 4 inches, and bind off. This ensures your tension perfectly matches the tension you’ll use for the actual sock.
2. Understanding “The Tightness Problem” (Needle Size)
Many new sock knitters pick the needle size suggested on the yarn label. Don’t do it!
- Bulky Fabric vs. Durable Fabric: Yarn labels usually suggest a needle size that produces a nicely draped fabric (like for a shawl or sweater). For socks, you don’t want drape; you want a firm, almost stiff fabric that can withstand friction.
- The Rule of Thumb: Expect to use needles at least two to three sizes smaller than what the yarn label suggests. If the label says US Size 4 (3.5 mm), you should probably start with US Size 1 or 1.5 (2.25 mm or 2.5 mm). This is how you achieve that critical dense gauge.
3. “Second Sock Syndrome” Starts Before the First Stitch
You know about the syndrome, but you can prevent it with good planning:
- Prep the Second Yarn: If you are not knitting two-at-a-time, wind your yarn into two separate balls before you start the first sock. If you finish Sock #1 and the yarn for Sock #2 is already ready to go, it reduces the mental hurdle.
- Take Notes: Keep a detailed, running note of every single measurement (cuff length, heel depth, foot length before the toe decreases, etc.) while knitting the first sock. This eliminates the guesswork for the second, turning it into mindless repetition.
4. Yarn Management and Center-Pulling
Sock knitting uses small amounts of yarn relative to other projects, but the yarn itself often comes in a skein (a loop).
- Wind Before You Knit: Never try to knit from the skein! Always wind the yarn into a neat ball or, preferably, a cake using a swift and ball winder. This prevents tangles and knots, which are incredibly frustrating on small needles.
- Use the Center-Pull: When knitting from a cake, pull the yarn end from the center. This keeps the cake stationary on your table and prevents it from rolling away and collecting dust bunnies or pet hair.
5. The Magic of Blocking a Sock
When you finish your first sock, it will likely look a bit crumpled, uneven, and lumpy – especially around the heel flap. Don’t worry, this is normal!
- The Transformation: Blocking is the process of washing the finished item and shaping it while it dries. For socks, you often use a sock blocker (a foot-shaped wire or plastic frame).
- What It Does: Soaking the sock in lukewarm water (with a wool wash) and then stretching it onto the blocker evens out all your stitches, makes the lace or ribbing pop, and magically straightens the heel flap. The difference is incredible and will make your final sock look professional.
Happy knitting! You’re about to create something amazing for your feet. Say goodbye to uncomfortable commercial socks and hello to handmade luxury.
More knitting fun! How to knit a simple vest for beginners. Easy double-layered scarf pattern.