
How to sew Roman blinds for beginners: your ultimate DIY guide
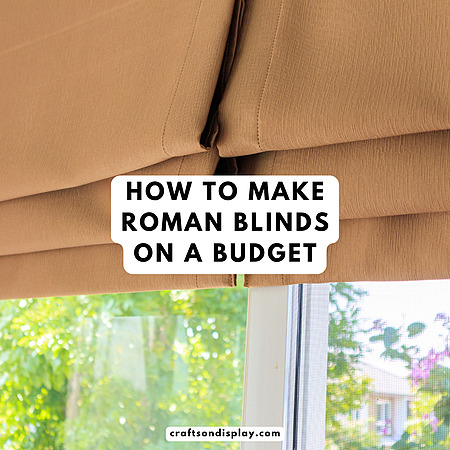
Window treatments are a massive part of a room’s design. They cover a huge amount of wall space and instantly bring warmth to a space. Yet, so many people treat them as an afterthought because buying custom options can cost an absolute fortune. If you love the clean, tailored look of classic window coverings, learning how to sew Roman blinds for beginners is a total game-changer.
You do not need to be a professional tailor or a math genius to master this DIY project. If you can handle straight lines on a sewing machine and know how to operate a drill, you can create gorgeous, custom fabric blinds for any window in your house.
This comprehensive guide covers everything from accurate measuring to clever material hacks, plus the absolute best tutorials to help visual learners build confidence.
How do Roman blinds actually work?
Imagine your blind is like a flat piece of fabric. When it is time for the blind to wake up and let the sunshine in, it folds up into neat, flat layers at the top of your window.
But how does it do that? It uses a clever little teamwork system on the back of the curtain where nobody can see it.
First, we sew long, straight pockets across the fabric and slide thin wooden sticks inside them. These sticks act like tiny bones to keep the fabric perfectly flat and straight so it doesn’t get floppy.
Next, we sew a row of tiny plastic rings down the back of the curtain, right on top of those sticks.
Finally, we tie long pieces of string to the very bottom rings and thread them straight up through all the other rings, all the way to the top of the window.
When you pull on the main string at the side of your window, it pulls the strings on the back. The bottom stick lifts up and bumps into the next stick, folding the fabric perfectly in half. As you keep pulling, all the sticks stack up together at the top. When you let the string go, the heavy bar at the bottom pulls everything back down so the curtain can go back to sleep.
Why DIY Roman shades make total sense
When you look at store-bought window treatments, the price tags can be shocking. Choosing the DIY route saves a massive amount of cash while giving you complete creative control over your decor.
- Customization: You can choose any drapery fabric that matches your style, from deep textured linens to bright, playful cotton prints.
- Efficiency: Roman shades use significantly less fabric than traditional, floor-length curtains. That means you can splurge on a high-quality face fabric without breaking the bank.
- Control: You decide exactly how much light gets in by picking the perfect lining material, whether you want soft, filtered daylight or total darkness.
The essential tools and materials you need
Before diving into the measurements, gather your supplies. Having everything ready on your work table makes the process smooth and stress-free.
- Drapery fabric: Medium-weight woven cotton, linen, or canvas works best. Avoid stretchy fabrics or overly heavy materials that refuse to fold nicely.
- Lining fabric: Standard drapery lining protects your face fabric from sun damage. For bedrooms or media rooms, choose a dedicated blackout lining fabric.
- Wooden dowels: These thin rods create crisp, sharp pleats when the shade raises.
- Weighted bottom bar: A heavy metal rod, flat wooden slat, or heavy plastic runner ensures the shade hangs completely flat and lowers effortlessly.
- Mounting board: A simple 1×2 wooden board cut to the exact width of your window frame.
- Screw eyes and small pulleys: These screw into your mounting board to guide the lift cords.
- Lift cord: Strong nylon string or specialized blind cord.
- Roman blind tape or plastic rings: To secure the cords to the back of the blind.
- Fasteners: Heavy-duty staple gun, drill, screws, mounting brackets, and a cord cleat or cord lock mechanism.
- Sewing essentials: Sewing machine, matching thread, fabric marker, iron, pins, and scissors.
How to measure your window like a pro
The secret to a flawless DIY Roman blind lies entirely in the accuracy of your initial measurements. If you cut the fabric crooked, the blind will pull unevenly. You need to decide whether you are installing an inside mount or an outside mount.
- Inside mount: The blind sits neatly inside the recessed window frame. Measure the exact width of the inside window opening at the top, middle, and bottom. Use the narrowest width measurement so the blind does not rub against the drywall. Measure the height from the top jamb down to the sill.
- Outside mount: The blind hangs on the wall outside the frame, covering the entire window molding. Measure the width of the area you want to cover, extending a couple of inches past the frame on each side to block light leaks. Measure the height from your intended mounting point down to where you want the blind to finish.
Calculating your fabric cutting guide
Once you have your finished dimensions, you need to add seam allowances for the top, bottom, and side hems.
- Fabric width: Add 3 inches to your finished width. This allows for a generous 1.5-inch double hem on both the left and right sides.
- Fabric length: Add 5 to 7 inches to your finished height. This extra length covers the top fold where the fabric attaches to the mounting board and forms the weighted pocket at the bottom hem.
- Lining dimensions: Cut your lining fabric to the exact finished width of the window (which makes it narrower than your face fabric). Cut the height to match your face fabric precisely. This specific size difference forces the main drapery fabric to wrap around to the back side, hiding the raw lining edges completely from view.
Mastering the math of pleat and rod spacing
Figuring out where the horizontal rods go can feel daunting, but a simple rule of thumb keeps everything in perfect proportion. Generally, the pleats should stack between 8 and 12 inches apart.
To find your spacing, take the total finished height of your shade and subtract about 2 or 3 inches for the top mounting zone. Divide the remaining number by the number of sections you want. The section at the very bottom should equal half the distance of a standard middle section plus 1 inch. This specific calculation prevents the bottom fold from hanging down below the rest of the blind when you pull it all the way up.
For example, if your standard middle sections sit 10 inches apart, your bottom section should be 6 inches long. Mark these horizontal lines onto the back of your lining fabric using a ruler and a water-soluble fabric marker.
Step-by-step sewing instructions
- Prepare the fabrics: Thoroughly iron your drapery fabric and lining to remove every single wrinkle before cutting.
- Sew the side seams: Lay your drapery fabric right side up on a large table or clean floor. Place the lining fabric right side down on top of it, aligning the left edges. Pin the edge and sew down the length with a half-inch seam allowance. Now, pull the unstitched right edge of the lining over to meet the right edge of the face fabric. Pin and sew.
- Press the main panel: Turn the fabric tube right side out. Center the lining on the back. Because the lining is narrower, an exact 1-inch border of your gorgeous drapery fabric will naturally wrap around to the back side. Press these crisp side edges flat with your iron.
- Construct the bottom hem: Fold the bottom edge up by 1 inch, then fold it up another 2.5 inches to create a sturdy channel. Press and pin. Sew across the top edge of this fold to form a pocket, but leave the side ends completely open so you can slip your weighted bar inside later.
- Create the rod pockets: You can sew simple strips of lining fabric directly onto your marked lines. Cut the pieces to the width of the blind plus an inch for neat end folds. Leave one end open to slide the dowels in.
- Attach the lift rings: Hand-sew small plastic rings along the rod pockets. You need a column of rings on the far left, the far right, and right down the center. Keep the outer columns at least 2 inches away from the side edges so the pull strings clear the mounting brackets.
Assembling the lifting mechanism
Once your fabric panel is fully sewn, it is time to turn it into a functional shade.
- Insert the hardware: Slide your thin wooden dowels or fiberglass rods into each horizontal rod pocket. Slip your heavy weighted bar into the bottom hem pocket. Hand-sew the open ends of the pockets closed so the rods stay locked in place.
- Attach to the mounting board: Lay your wooden 1×2 board at the very top of your shade panel. Wrap the top excess fabric tightly around the board and secure it firmly using a heavy-duty staple gun. Alternatively, you can use hook-and-loop Velcro tape for a removable, washable option.
- Install the guide hardware: On the underside of the wooden mounting board, screw in your eye hooks or small pulleys. These must line up exactly with the columns of plastic rings sewn onto the back of your fabric. Add one final extra screw eye at the specific side of the board where you want the cords to hang down.
- Thread the lift cords: You need an independent cord for each vertical column of rings. Start at the bottom ring of a column, tie the cord securely, and thread it straight up through all the rings in that row. When you reach the top, pass the cord through the corresponding screw eye on the board, and run it horizontally across the board through all the other screw eyes until it exits on the control side. Repeat this for every column.
- Balance the tension: Pull all the exiting cords simultaneously until the blind hangs completely straight, flat, and even. Tie the bundle of cords together in a secure knot just below the final exit hook to lock the tension in place.
Top tutorials for visual learners
DIY Roman shades on a budget, tutorial by A Butterfly House
This ultra-fast, beginner-friendly guide shows you how to build stunning custom shades without spending a fortune. The host shares brilliant shortcuts for cutting face fabric and blackout lining efficiently. You will learn a simple folding technique to sew flawless dowel pockets directly into the backing, staple the finished panel to a basic wooden board, and run a dual-cord system for smooth operation.
Easy Lined Roman Blind, Fabric BlindTutorial from Made By Sally
Sally shares a brilliant, cost-effective hack by upcycling a stylish duvet cover into beautiful custom bedroom blinds. This relaxed tutorial walks you through calculating custom pleats using online tools, machining simple tube side seams, and sewing pre-made rod pocket tape onto the lining. It is an approachable watch that covers hardware assembly, weighted bars, and cord spacing to avoid fabric gaping.
How to Make a Roman Shade by OnlineFabricStore
If you want an elegant, high-end look with almost no stitching visible on the front of your window treatment, this professional tutorial is a must-watch. The video demonstrates using stitch witchery to fuse rod pockets seamlessly to the lining. It also explains how to install a heavy-duty cord lock mechanism and pulleys on the mounting board for incredibly smooth daily operation.
DIY Roman Shades By House Beautiful
Lucy breaks down the entire assembly process into highly doable steps using a standard sewing machine and a drill. This design-focused tutorial teaches you exactly how to measure your window frame, sew a clean lining, and attach secure sew-in rings. The highlights also include a clear breakdown of threading a three-cord system.
Step-By-Step Lined Roman Shades By Willow Bloom Home
Shawna’s outside-mount tutorial delivers high-end custom results for beginners. Featuring a classic cotton lining, perfectly structured folds, and a beautiful invisible header, this design can easily adapt to inside window mounts. The guide details how to extend fabric 3/4″ past side frames and run it from above the window down to the lower trim for a tailored, professional look.
How to train your new Roman shades
When you hang your brand-new DIY blinds for the first time, the fabric folds might look a bit messy or stubborn. Do not panic, this is completely normal. Fabric has memory, and it needs to be taught how to behave.
Pull the blind all the way up to the top of the window, using your hands to neatly tuck and smooth out each pleat into place as it stacks. Once the blind is fully gathered and perfectly neat, tie the lift cords off securely. Leave the blind stacked up like this for three to four days. This simple waiting period sets crisp crease lines into the material permanently.
When you let the shade down later, it will naturally fold into beautiful, crisp rows every single time!
DIY Roman blinds for beginners
Learning how to sew Roman blinds for beginners is one of the most rewarding home decor projects you can tackle. It instantly elevates a room, saves you hundreds of dollars on custom manufacturing, and lets you show off your personal style.
By taking your time with the measurements, using iron-on hacks like stitch witchery if you hate visible seams, and training your fabric well, you will end up with a professional finish that looks like it came straight out of a design magazine. Grab your favorite fabric, set up your machine, and start sewing your dream window treatments today.
More sewing fun! Easy DIY chair cushions. Simple upholstered DIY ottoman tutorial.
Explore more
We're always looking for awesome makes!
Thank you for all of this information. In your closing paragraph, you say “training your fabric well.” Can you explain what you mean by that?
Hi Marian, you’re very welcome! It means you have to physically teach your blinds where to crease – use your hands to adjust every single fold. The material has memory so after a few times it will stack into nice accordion-style rows effortlessly.