
How to sew DIY reusable fabric bowl covers: 8 easy elastic patterns
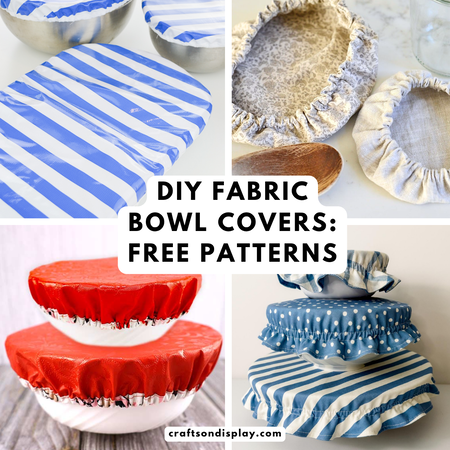
We have all been there. You pull out a roll of plastic wrap, try to cover a salad bowl, and it immediately clings to itself instead of the glass. You wrestle with it, waste half the box, and still end up with loose edges.
Plastic wrap is annoying, wasteful, and ends up straight in a landfill after one use. It can even leave that weird plastic taste on your fresh food. Luckily, your sewing machine offers the perfect solution: reusable DIY fabric bowl covers.
These elastic bowl toppers pop right over leftovers, dough bowls, and picnic dishes. They wash easily, look gorgeous on your counter, and keep flies away during outdoor barbecues. Whether you want a quick 15-minute scrap buster or a wipeable waterproof cover for the fridge, this roundup has you covered.
Here is everything you need to know about fabrics, sewing methods, and the best free DIY bowl cover tutorials online.
Why make the switch to DIY fabric bowl covers?
Making your own covers is one of the easiest eco-friendly swaps you can tackle. If you are on the fence, here are a few reasons they beat single-use plastics every time:
- Better for your wallet: Sew them once using leftover fabric scraps, and you will never need to buy cling film or disposable foil again.
- Great for outdoor eating: Bugs cannot crawl under a tight elastic hem. They are a must-have for camping, potlucks, and backyard barbecues.
- Tasteless and odorless: Breathable cotton or food-safe fabrics protect food without transferring chemical plastic smells.
- Bread baker friendly: A breathable linen cover is the secret weapon for proofing sourdough, letting dough rise without sweating.
- Zero-waste gift idea: Wrap up a bowl of homemade cookies or fresh bread in a handmade cover for a charming housewarming present.
What fabrics work best for reusable bowl covers?
Before diving into the patterns, let’s talk materials. The right fabric depends on how you plan to use your covers.
1. Breathable natural fibers (Cotton and linen)
Best for: Proofing bread, keeping fruit on the counter, and covering dry snacks or baked goods.
Why choose it: Cotton and pure linen allow airflow so humidity does not build up. They wash easily in hot water and can go straight into the dryer. Plus, quilter’s cotton comes in endless fun prints.
2. Food-safe waterproof materials (PUL, laminated cotton, or oilcloth)
Best for: Fridge leftovers, saucy salads, dips, and airtight food storage.
Why choose it: PUL (Polyurethane Laminate) creates a wipeable barrier that prevents moisture from escaping. If you use laminated cotton or oilcloth, double-check that your fabric is certified food-safe, since traditional oilcloth can contain lead or plasticizers not meant for direct food contact.
8 Free DIY elastic bowl cover sewing patterns and tutorials
1. Multi-size stash buster: Made for Mermaids
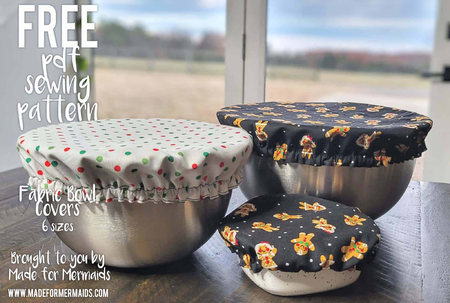
If your kitchen cabinets hold everything from ramekins to giant mixing bowls, this pattern is your best bet. Made for Mermaids offers a free pattern for fabric bowl covers in six distinct sizes. The size range covers small 8-inch bowls all the way up to huge 36-inch party bowls. That makes it super versatile for everyday prep or holiday leftovers.
The construction creates a snug fit that stays put when transporting dishes to potlucks and parties. It works nicely with standard woven cotton or lightweight waterproof layers. Grab your widest bowls, take quick measurements, and check out the Made for Mermaids 6-size fabric bowl cover pattern to whip up a matching kitchen set.
2. Reversible waterproof design: Hello Sewing
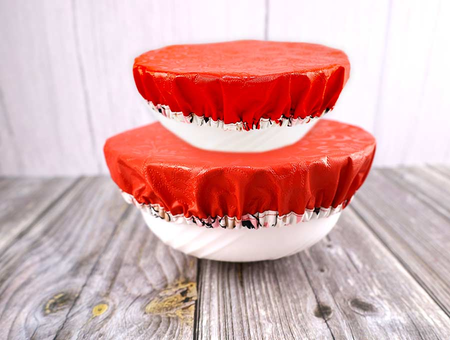
Hello Sewing shares a clever tutorial designed to keep moisture locked in and bugs locked out. This project uses food-safe PUL or waterproof fabric to block moisture and stop lingering plastic tastes. What makes this version standout is the construction method: you cut one larger circle and one slightly smaller circle.
When you bind the raw edges using double fold bias tape, it naturally pulls the contrasting fabric outward. The result is a fully reversible, professional-looking cover with a neat decorative border. Read the step-by-step Hello Sewing DIY reversible waterproof bowl cover tutorial to make yours in under 20 minutes.
3. Breathable linen cover: Our Gabled Home
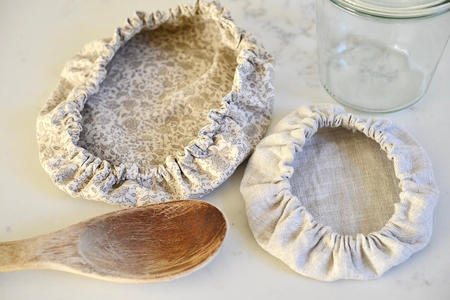
If you love a clean, rustic, farmhouse look, this linen project hits all the right notes! Our Gabled Home walks you through making custom-fit bowl covers using natural linen fabric. Linen is naturally antimicrobial, durable, and softens with every single wash. It lets moisture breathe, making it hands-down the best choice for sourdough bakers during the dough-proofing stage.
The tutorial shows you how to measure whatever custom bowls, mixing crocks, or mason jars you actually reach for daily. You can choose to make a simple, quick unlined cover or sew a lined two-layer version for extra body. Head over to the Our Gabled Home linen bowl cover sewing guide to bring some natural texture to your counter.
4. Beginner-friendly bias tape method: Madam Sew
Madam Sew breaks down how to sew custom covers for both bowls and wide dinner plates. This tutorial is fantastic for confident beginners who want to practice sewing curves and using bias tape. You cut two equal-sized circles, sandwich them together, and encase the outer edge with bias tape to create the elastic casing.
You can make lined or unlined versions, and they scale easily to cover round dinner plates to hold evening leftovers in the fridge. They wash easily in the laundry and make great outdoor dinner gear. Follow the Madam Sew reusable plate and bowl cover instructions for clear tips on mastering curved bindings.
5. Wipeable fridge covers: Heather Handmade
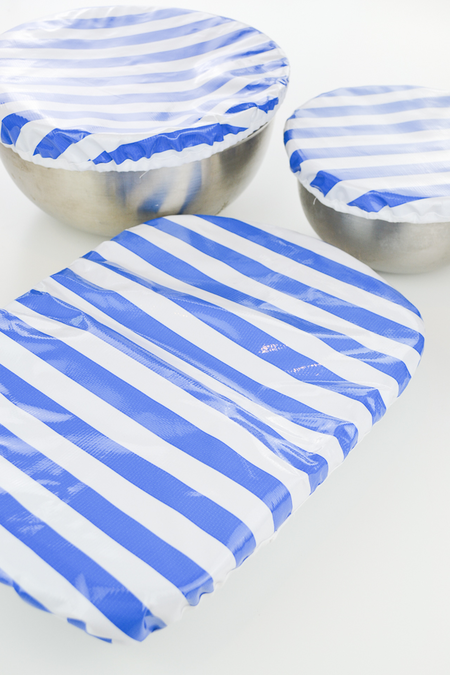
Heather Handmade focuses on heavy-duty, moisture-sealed covers that stand up to daily fridge use. If you want a cover that you can simply wipe clean between uses, this tutorial explains how to sew with laminated cotton, oilcloth, or PUL. Heather notes that laminated fabrics keep food much closer to airtight than basic cotton, preventing cut fruit and pasta salads from drying out in the fridge.
The edge finishes cleanly with bias tape to hide raw edges and thread the elastic smoothly. Learn the details via the Heather Handmade wipeable DIY bowl covers tutorial.
6. The serger shortcut: Too Much Love
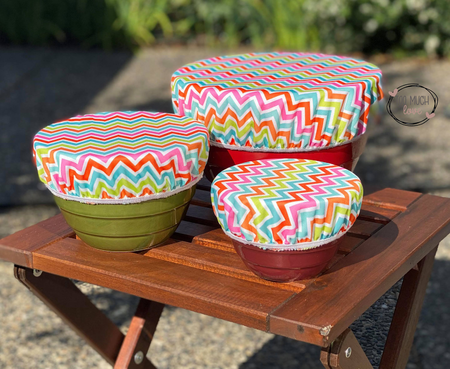
Short on time? Too Much Love treats sewing a bowl cover just like making a mini shower cap. If you use PUL or waterproof fabric that does not fray, you can bypass folding casings or sewing bias tape completely. Instead, use an elastic presser foot to zigzag stitch or serge the elastic directly onto the edge of the raw fabric while stretching it.
If you are working with fraying fabrics, simply trim the circle with pinking shears or run it through your serger first. It cuts sewing time down to just a few minutes per cover. Try out the Too Much Love quick serged bowl cover pattern for the fastest batch sewing method around.
7. Pretty gathered ruffles: Gathered Seams
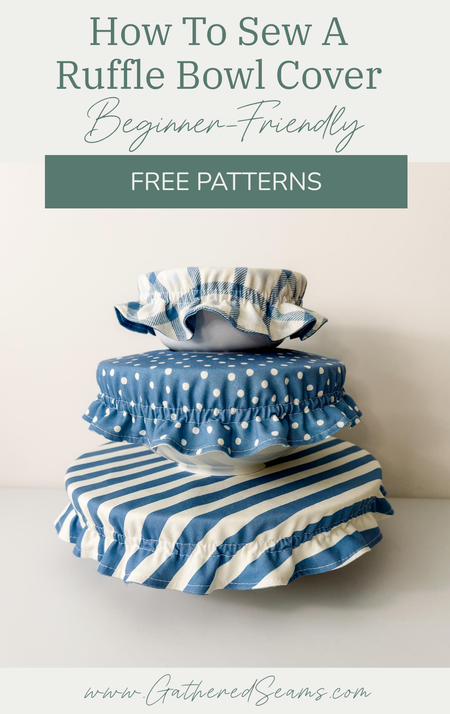
Want something with a bit of cottagecore charm? Gathered Seams adds a sweet ruffled skirt to the standard circle design. This free printable pattern comes in 3 sizes: small (fits 4 to 6-inch bowls), medium (fits 7 to 9-inch bowls), and large (fits 10 to 12-inch bowls). You can sew it using classic cotton or linen, or pair a decorative cotton exterior with a food-safe waterproof PUL liner.
The built-in ruffle takes a little more yardage, but the finished look has great vintage appeal. These are a massive hit at farmers markets and craft fairs because they look so polished. Grab your templates from the Gathered Seams printable ruffle bowl cover pattern.
8. Ricrac vintage trim: Sew 4 Home
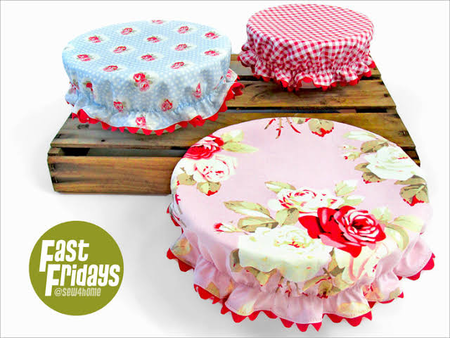
Sew 4 Home adds a pop of retro flair to this quick table accessory. This project uses colorful fat quarters and scraps, fitting bowls up to 10 inches in diameter. What makes it unique is the sweet decorative ricrac trim framing the edge, giving it an instant country-kitchen vibe.
Instead of threading elastic through a tight, fiddly casing, you stitch narrow elastic directly onto the back of the fabric using a zigzag stitch. It is fast, eliminates bunching issues, and keeps the hem flat and bouncy. Check out the Sew 4 Home ricrac and ruffle bowl cover tutorial to dress up your picnic table.
Pro tips for sewing elastic bowl covers
To make sure your covers fit securely and hold up in the wash, keep these quick tips in mind:
- Measure your circle properly: As a general rule, cut your fabric circle 2 to 3 inches wider in diameter than the top rim of your bowl. This provides enough depth to cup the sides.
- Calculate your elastic length: Cut your elastic roughly two-thirds the circumference of your bowl rim. This ensures enough stretch to slide on easily while pulling tight against the base.
- Use polyester thread: If you are sewing PUL or waterproof fabrics for the fridge, polyester thread resists mildew and rot much better than cotton thread.
- Wash cool and hang dry: While cotton can take high heat, PUL and laminated fabrics last much longer if you wash them on cool cycles and air dry them.
Turn inspiration into action!
Switching out disposable plastic wrap for handmade DIY bowl covers is an easy sewing win. You get to burn through colorful fabric scraps, hone your skills with bias tape and elastic, and do something good for the planet all at once. Pick out your favorite bowls, grab a yard of elastic, and give one of these fun patterns a spin this weekend.
Which bowl cover style are you going to sew first?
More sewing fun! How to sew the perfect oven mitt (free pattern). DIY ruffle placemats.
Explore more
We're always looking for awesome makes!