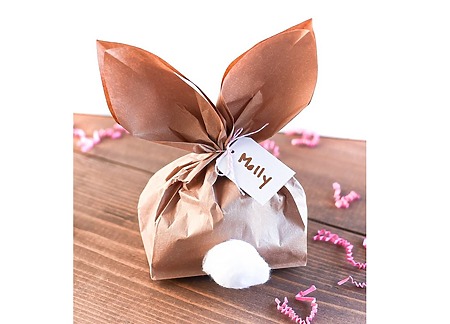
Create your own adorable Easter bunny paper bag with this simple and quick tutorial! You’ll be amazed at how easy it is to transform a plain paper lunch bag into a cute treat holder. Start by grabbing a standard paper lunch bag. Sketch out the outline of bunny ears on the top flap of the bag. Then, carefully cut along the sketched lines to create the bunny ears. The instructions below are so easy to follow – anyone can complete this project in a few minutes! To add an extra touch of cuteness, use hot glue to attach a big cotton ball as a bunny tail to the back of the bag. And there you have it – a sweet Easter bunny paper bag ready to be filled with treats and gifted to friends and family! It’s a fun and creative way to add a special touch to your Easter celebrations.
More crafting fun. Make an easy Easter basket from a recycled coffee can – a fun and practical DIY. Try flower-shaped Easter baskets made from coffee filters for a delicate touch. Fold an adorable origami chick in an egg – super beginner-friendly! Or create a mini Easter basket from a paper cup – quick and fun!