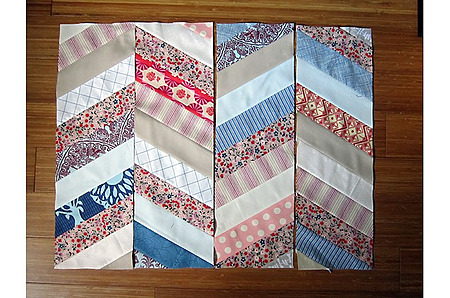
Add a herringbone quilt to your project list with this helpful tutorial! The herringbone block is created using 2″ finished strips, and the tutorial shares a technique to cut the blocks more consistently using the angle on a ruler. The finished size of the quilt block is 12″ x 20″. For supplies, you’ll need 2.5″ wide strips and a 6″ x 24″ rigid quilting ruler. If you have jelly rolls, they are perfect for this block as they are already 2.5″ wide. Even if you’re cutting from yardage, this tutorial is designed to minimize waste, making it efficient and economical.
Herringbone block tutorial
Explore more
Share the love or add us to your Google feed!
Have a free pattern or tutorial you'd love to share?
We're always looking for awesome makes!
We're always looking for awesome makes!