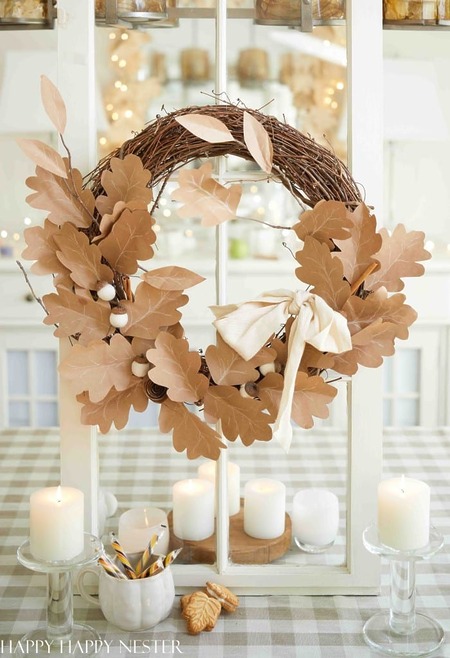
Bring autumn charm into your home with this eco-friendly DIY paper wreath from Happy Happy Nester. All you need are a few brown grocery bags, scissors, and a bit of creativity! Simply cut out leaf shapes from the bags and enhance them with veins using a white chalk pen for extra detail. The more paper bags you use, the fuller and more beautiful your wreath will look. You can arrange the leaves randomly for a natural vibe or follow a specific pattern for a more polished design.
This upcycled craft is a fun, budget-friendly way to decorate your home for fall, and the best part is it only takes about an hour to complete. Hang your finished wreath on your front door, above the mantel, or anywhere you’d like to add a rustic autumn touch!
More crafting fun! DIY paper chrysanthemums (free pattern). How to make beaded spiders for holiday decor in 15 minutes.