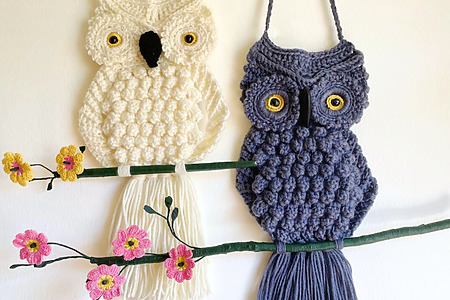
Get ready to crochet the cutest owl on a branch with this easy and detailed tutorial! This lifelike owl wall hanging will add a delightful touch to your home decor, and you’re gonna have a blast learning how to make it. To make things easier, the tutorial is divided into three parts. In Part 1 and Part 2, you’ll master crocheting the owl, while Part 3 will show you how to crochet the flowers and attach them to the branches.
For this adorable project, gather your supplies: around 285 yards of yarn, a 4.5mm crochet hook, scissors, a needle, black beads, and a tree branch. Simply follow the step-by-step instructions in each part of the tutorial to bring the owl and crochet flowers to life. The finished piece makes a heartwarming gift or a cozy addition to your wall decor. It’s relaxing, creative, and the result is totally magical!
More crafting fun! DIY macrame heart wall hanging. Crochet fruit hammock.