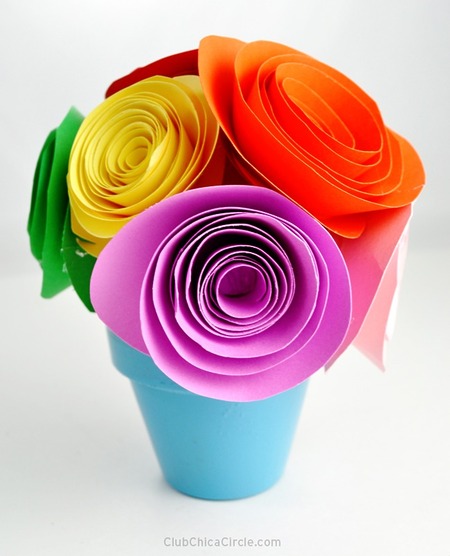
Home » Paper crafts » Easy paper flowers DIY tutorial

Easy paper flowers DIY tutorial

Category

Tags

Embrace the summer vibes and bring a touch of everlasting beauty to your decor with these easy-to-make paper flowers. Gather some colored or patterned scrapbook paper, scissors, and a glue gun to get started. Begin by cutting a circle out of a 6″ x 6″ square, rounding off the corners. Then, cut a spiral inside the circle, about 1/2″ thick, until you reach the center, leaving a small quarter-sized circle. Twist the paper spiral into a flower shape, using a pencil or chopstick as a guide. Secure the center with hot glue, and voila! You’ll find yourself unable to stop at just one flower. Make a whole bouquet of colorful paper flowers using solid or patterned paper for a gorgeous result.

Related posts

Paper crafts
Free large paper flower template
Earrings, Jewelry
Magnolia polymer clay earrings tutorial
Home Decor
Daisy macrame wall hanging tutorial
Embroidery, Floral Embroidery
Floral heart wreath embroidery tutorial
Paper crafts
How to make big paper roses: free pattern
Embroidery, Nature Inspired Embroidery
Floral spring felt ornaments tutorial
Embroidery, Embroidery on Clothes
How to embroider flowers on a sweater
Paper crafts
How to make giant paper roses tutorial
Paper crafts
How to make tulip paper flowers
Embroidery, Floral Embroidery
Free wisteria embroidery pattern
Embroidery, Nature Inspired Embroidery
Bee and flowers free embroidery pattern
Paper crafts
How to make roses from paper napkins

Comments

Leave a Comment